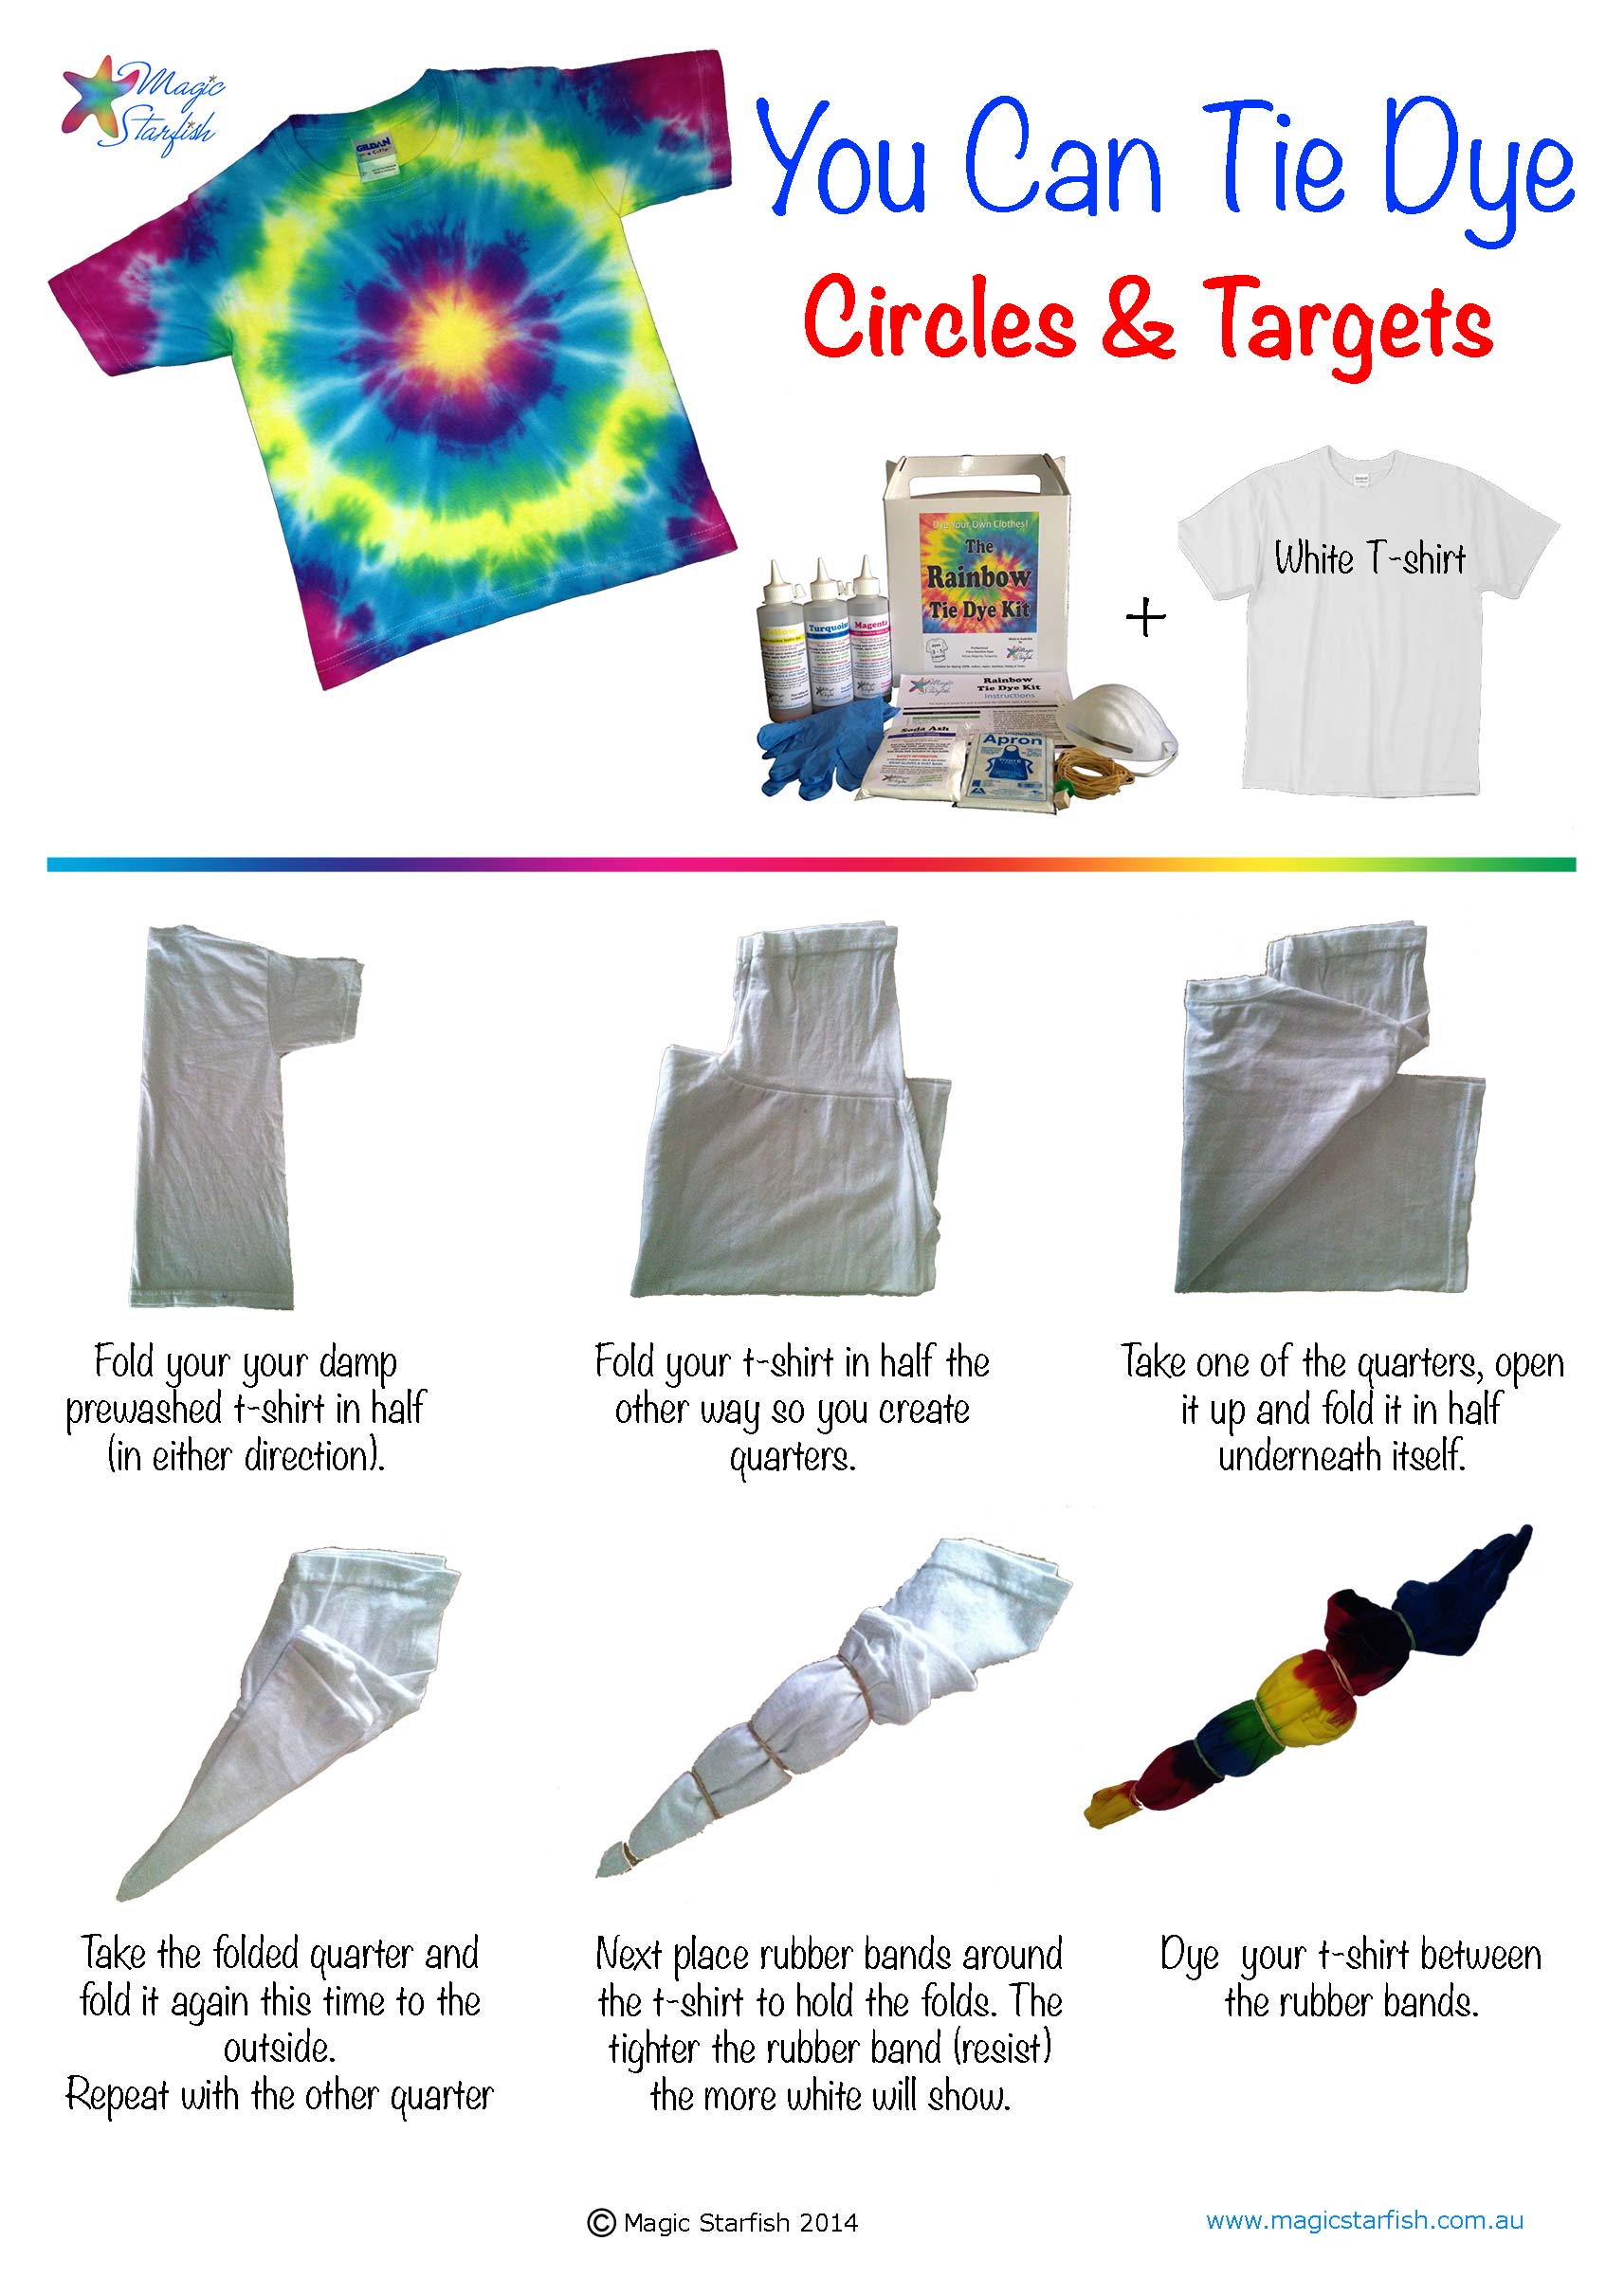
Immerse yourself in the vibrant world of tie dye, where creativity knows no bounds! Crafting your own tie-dyed masterpieces is not just an art form, but an exhilarating adventure. Here’s a guide to help you unlock the kaleidoscope of colors and patterns with simple instructions.
Getting Started with Tie Dye

Before you dive into the whimsical realm of tie dye, gather your essential materials: plain white cotton fabric, tie dye kit (or fabric dyes), rubber bands, plastic gloves, and plastic squeeze bottles. A waterproof surface cover is also highly recommended to protect your workspace from splashes. Remember, aesthetically pleasing results begin with the right preparation!
Exploring Creative Patterns

The allure of tie dye lies in its countless patterning possibilities. From spirals to stripes, the options are endless. Start with the classic spiral: pinch the center of your fabric, twist it, and secure it with rubber bands to create a segmented whirlpool. Alternatively, consider the crumple technique, where scrunching up the fabric haphazardly before securing it delivers a mesmerizing effect. Each twist and turn will dictate the final look!
Mixing Your Dyes

Once your fabric is prepared, it’s time to bleed color into your creation! Utilize squeeze bottles to mix your fabric dyes with water, depending on the desired hue intensity. Position your dye colors strategically; think about the color wheel! Blending complementary colors can yield striking results, while analogous colors will deliver a splendid harmony. Wetting your fabric beforehand can enhance the color absorption!
The Art of Dye Application

Now comes the exhilarating part—applying the dye! Use your squeeze bottles to saturate each section of the fabric, mindful of where you wish to place each color. Be bold! Experiment with ombre techniques by gradually lightening the dye concentration. Once you’ve completed dyeing, let your fabric sit for 6-8 hours to ensure that colors meld beautifully. Patience is paramount as the magic unfolds.
Washing and Revealing Your Creation

After the waiting period, rinse your fabric under cold water until the water runs clear. Remove the rubber bands with care, revealing the intricate patterns you’ve crafted. Wash the dyed fabric separately in cold water with a gentle detergent, allowing the colors to set securely. Embrace the delight of unveiling your unique creation and let your personality shine through your fabulous tie-dyed garment!
Tap into your artistic flair and spread good vibes with your homemade tie dye pieces. Whether you wear them, gift them, or showcase them, every piece tells a story. Now go, ignite your imagination, and let the world see the vibrancy of your creativity!


